You know that feeling when you’re standing in front of something absolutely stunning, you snap a photo, and then… it looks nothing like what you saw? Yeah, we’ve all been there. Your phone camera roll is probably filled with travel shots that seemed incredible in the moment but somehow fall flat when you scroll through later. I’ve spent years chasing the perfect travel shot, and trust me, it’s not about having the fanciest gear or being a professional photographer.
What really separates scroll-stopping Instagram photos from the “meh” ones comes down to a few key techniques that anyone can master. Ready to transform your travel photography game? Let’s get into it.
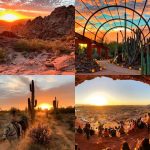
Master the Golden Hour Magic
Here’s the thing about lighting: it can make or break your shot faster than you can say “Instagram worthy.” The golden hour, that magical time right after sunrise and before sunset, gives you soft, warm light that makes everything look dreamy. I’m talking about that gorgeous glow that makes even a random street corner look like it belongs in a travel magazine.
Why does everyone obsess over golden hour? The sun sits low on the horizon, creating long shadows and bathing everything in golden-orange tones. Your photos get natural depth and dimension without any fancy editing. Plus, harsh shadows disappear, so you don’t get those unflattering dark spots across faces or buildings.
Set your alarm early or plan your evening shoots accordingly. Trust me, it’s worth dragging yourself out of bed when you see the results. FYI, you can use apps like Golden Hour or The Photographer’s Ephemeris to track exact timing for your location.
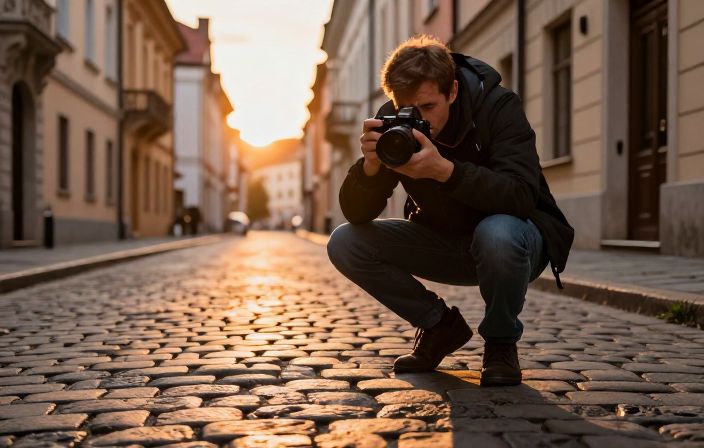
Get Low, Go High, Change Everything
Ever wonder why some travel photos feel so dynamic while others look… boring? Perspective is your secret weapon. Most people shoot everything at eye level because, well, that’s comfortable. But comfortable rarely equals compelling.
I challenge you to get uncomfortable. Crouch down until you’re practically kissing the ground. Hold your camera above your head. Stand on a bench (safely, please). These different angles transform ordinary scenes into extraordinary shots. A low angle makes buildings tower dramatically above you, while shooting from above gives you that coveted bird’s-eye view.
One of my favorite tricks? Use foreground elements to frame your subject. Shoot through leaves, doorways, or even a fence. This creates layers in your image and pulls viewers into the scene like they’re actually standing there with you.
Rule of Thirds Is Your Best Friend
Okay, composition time. The rule of thirds sounds fancy, but it’s stupidly simple. Imagine your frame divided into nine equal parts with two horizontal and two vertical lines. You place your subject or horizon along these lines or at their intersections instead of dead center.
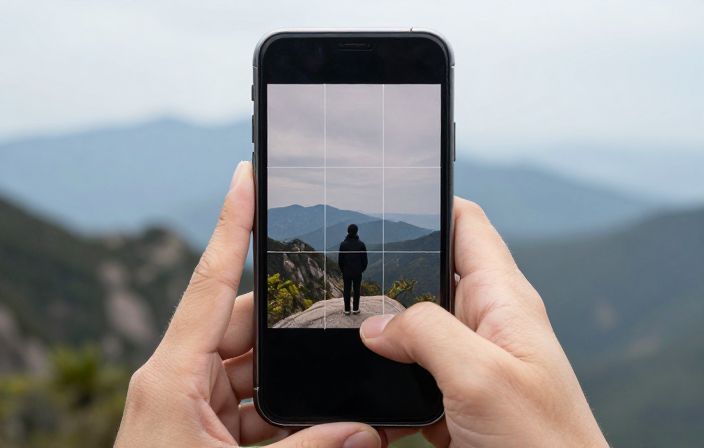
Why does this work? Our eyes naturally gravitate toward these intersection points. A centered photo can feel static and boring, but following the rule of thirds creates balance and visual interest. Turn on your camera’s grid lines (yes, that feature actually serves a purpose!) to help you nail this every time.
That said, rules exist to be broken sometimes. Symmetrical shots of buildings or reflections can look amazing centered. Use your judgment and trust your eye.
Add Humans for Scale and Story
Here’s something I learned the hard way: landscapes without people can feel empty. Including a human element gives your shots scale, emotion, and relatability. That massive waterfall becomes even more impressive when viewers see a tiny person standing beside it.
You don’t need to make it a full-on portrait either. A silhouette walking down a street, someone gazing at a view, or locals going about their day all add life to your images. These moments tell stories that pure landscape shots just can’t capture. IMO, the best travel photos make viewers feel like they’re experiencing the journey with you.
Pro tip: Keep it candid when possible. Real laughter beats fake “influencer giggles” every single time. Make your travel buddy actually laugh, capture someone mid-motion, or wait for genuine moments to unfold.
Leading Lines Lead to Better Photos
Leading lines are compositional elements that guide your viewer’s eye through the image toward your main subject. Think railroad tracks, winding roads, bridges, coastlines, or even rows of trees. These natural pathways create depth and draw people into your photo.
I actively hunt for leading lines everywhere I travel now. That cobblestone street curving toward an old church? Perfect. The railing along a pier directing attention to a lighthouse? Chef’s kiss. Even subtle elements like shadows or architectural details can serve as leading lines.
The cool part? Leading lines work at any angle. Diagonal lines create energy and movement, while horizontal lines suggest calm and tranquility. Experiment with different line directions to match the mood you want to convey.
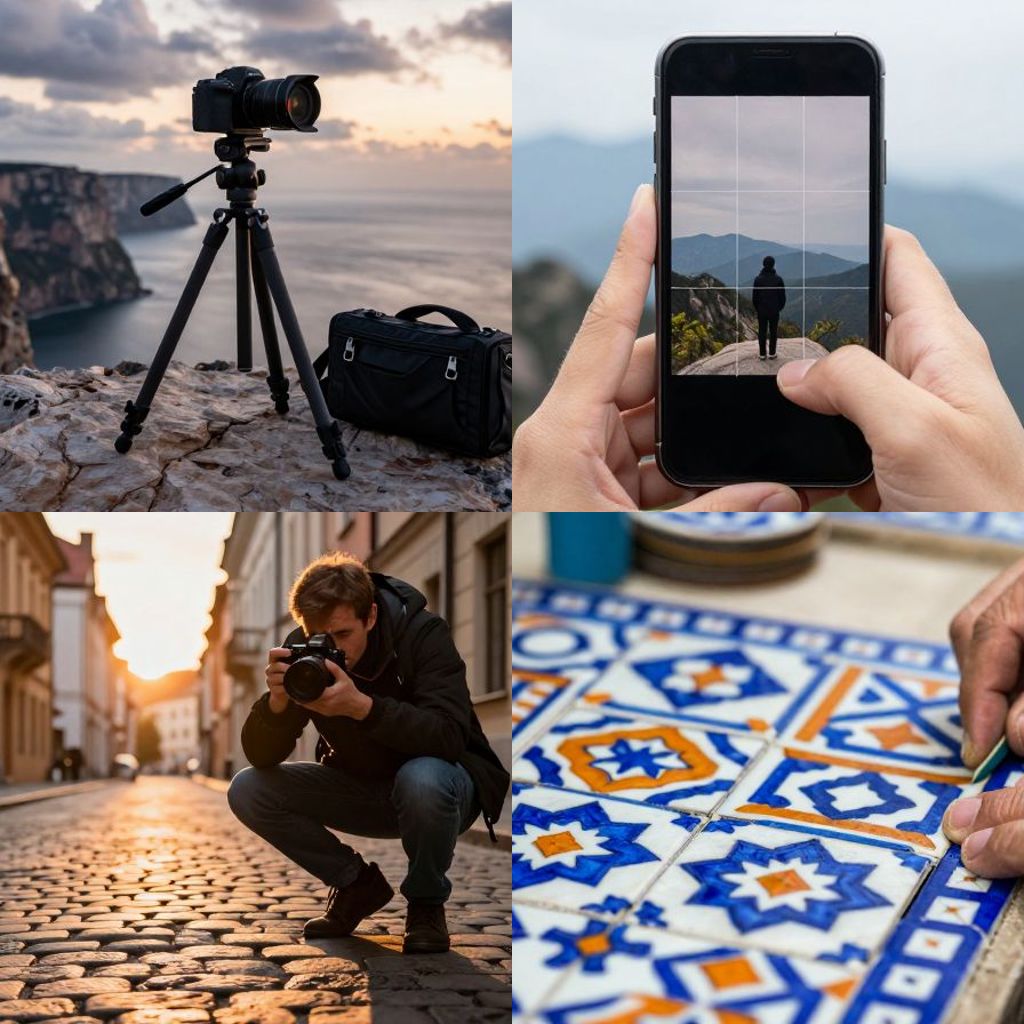
Zoom with Your Feet, Not Your Fingers
Real talk: digital zoom is basically your enemy. When you pinch to zoom on your smartphone or use digital zoom on your camera, you’re just cropping and enlarging the image, which destroys quality faster than you can say pixelated mess.
Instead, physically move closer to your subject. Walk those extra steps, climb those stairs, get in there. You’ll capture sharper, more detailed images with better resolution. This matters especially if you want to print your photos or maintain quality when posting to Instagram.
Can’t get physically closer? That’s when a good zoom lens comes in handy if you’re using a camera. But for smartphone photographers, just get as close as safely possible and crop in editing if needed. Your image quality will thank you.
Embrace Color for Visual Pop
Color tells stories in ways that composition alone can’t. Intentional color choices set the mood and make your images pop right off the screen. I always pay attention to how colors interact within my frame.
Look for complementary colors like blue and orange, or analogous colors like various shades of green and yellow. A bright red door against a white building? That’s visual gold. Colorful street markets, vibrant textiles, or sunset-painted skies all create immediate impact.
You can also go the opposite route with monochromatic scenes. All white buildings in Santorini or misty blue mountain ranges create a cohesive, calming aesthetic. Pay attention to what colors appear in your scene and use them deliberately.
Nail Your Camera Settings
Let’s talk technical stuff for a second. Understanding basic camera settings elevates your photography from “meh” to “whoa.” You don’t need to shoot full manual right away, but knowing what each setting does helps tremendously.
Aperture Priority mode is your friend for travel photography. Set your aperture (f-stop) based on what you’re shooting, and let your camera handle shutter speed. For landscapes, use f/8 to f/11 to keep everything sharp from foreground to background. For portraits or detail shots, try f/2.8 to f/5.6 for that dreamy blurred background.
Keep your ISO as low as possible, usually around ISO 100 in good light. This minimizes grain and keeps your images crisp. When light gets scarce, bump it up as needed, but don’t go higher than necessary. And for shutter speed? Aim for at least 1/60th of a second when shooting handheld to avoid camera shake blur.
Quick Settings Cheat Sheet
- Bright daylight landscapes: f/8-f/11, ISO 100, shutter 1/125s or faster
- Indoor or low light: f/2.8-f/5.6, ISO 400-1600, use tripod if possible
- Action or wildlife: f/5.6-f/8, ISO 400+, shutter 1/250s or faster
- Night photography: f/8-f/11, ISO 100, long shutter (requires tripod)
Bring a Tripod (Seriously)
I know, I know. Tripods seem like a hassle when you’re traveling light. But hear me out: a quality tripod opens up so many creative possibilities that you can’t achieve handheld. Long exposures, sharp night shots, and silky smooth waterfalls all require stability.
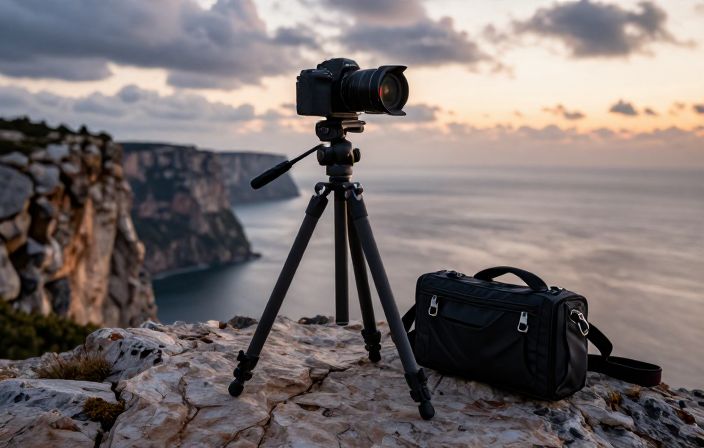
You can keep your ISO low even in dim conditions, which means better quality photos with less grain. Plus, tripods let you use the self-timer for group shots or solo travel portraits without begging strangers to photograph you. Modern travel tripods fold down small and lightweight, so they’re not the bulky monsters you might imagine.
For smartphone users, those little flexible tripods work wonders. Wrap them around railings, balance them on rocks, or set them on tables. Suddenly you’ve got stable shots and hands-free video capabilities.
Scout Locations Like a Pro
Want to know what separates amateur travel photos from professional-looking shots? Location scouting. The pros don’t just show up and hope for the best. They research, plan, and know exactly where they’re going before they arrive.
Instagram and Pinterest are goldmines for discovering photo spots. Search hashtags for your destination and check out what local photographers capture. When you find a location you love, save it to Google Maps or Apple Maps so you can easily navigate to it later. I keep a running shot list for every trip, adding locations whenever I find them.
This advance planning means you maximize your time on location instead of wandering around hoping to stumble onto something cool. You’ll know what time of day works best for each spot and can plan your route efficiently 🙂
Pay Attention to Details
Sometimes the best travel photos aren’t sweeping landscapes but tiny details that capture the essence of a place. The weathered hands of a craftsman, intricate tile patterns, street art tucked in an alley, or the way morning light filters through cafe curtains.
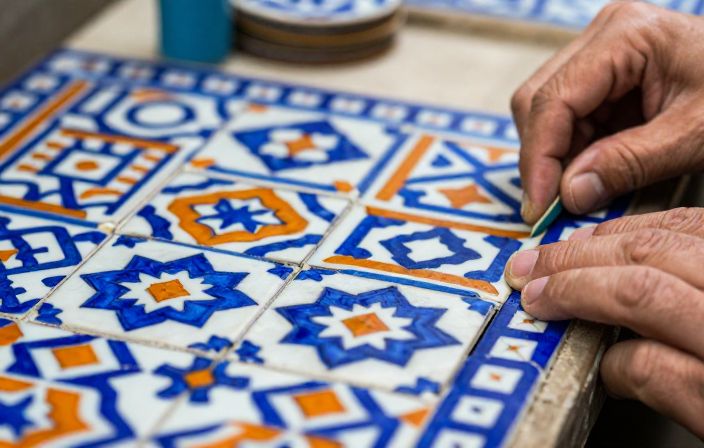
These detail shots add variety to your travel portfolio and tell more complete stories. They showcase the character and culture of a destination in ways that grand vistas can’t. I always dedicate time to hunting for these smaller moments because they often become my favorite images from a trip.
Get close and fill your frame with texture, patterns, and interesting elements. Don’t be afraid to ask locals where you might find the best details. They know their home better than any guidebook and often point you toward hidden gems.
Edit with Purpose, Not Presets
Editing can transform a good photo into a great one, but there’s a catch: you need to edit with intention. Slapping on random presets rarely gives you the results you want. Each image needs its own adjustments based on lighting, color, and mood.
Start with basic corrections: exposure, contrast, and white balance. These create your foundation. Then move to curves adjustments, which add depth by fine-tuning highlights and shadows. Finally, tackle color grading to enhance specific tones and create a cohesive mood. Want warm, earthy tones? Cool, moody blues? This is where you make it happen.
The key is subtlety. If your edit screams “I EDITED THIS!”, you’ve probably gone too far. Your goal is to enhance what you captured, not completely transform it into something unrecognizable. Keep it natural but polished.
Practice Makes Perfect (Obviously)
Here’s the truth nobody wants to hear: you’re not going to nail every shot immediately. Photography is a skill that improves with practice, experimentation, and yes, plenty of failures along the way. Every blurry photo and badly composed shot teaches you something.
The photographers you admire on Instagram? They’ve taken thousands of mediocre photos to get those handful of stunning images. They’ve experimented with techniques, failed repeatedly, and learned from each attempt. You’re not behind; you’re just starting your journey.
So grab your camera or phone and shoot constantly. Try new techniques, break rules intentionally, and develop your unique style. Review your images critically and figure out what works and what doesn’t. Over time, these twelve tips will become second nature, and you’ll start capturing those Instagram-worthy shots without even thinking about it. Now get out there and start shooting!